![[ANSYS, Inc. Logo]](fluentlogo.gif)


|
|
|
Sweep surfaces can be used when you want to examine the mesh, contours, or vectors on various sections of the domain without explicitly creating the corresponding surfaces. For example, if you want to display solution results for a 3D combustion chamber, instead of creating numerous surfaces at different cross-sections of the domain, you can use a sweep surface to view the variation of the flow and temperature throughout the chamber.
Steps for Generating a Plot Using a Sweep Surface
You can plot meshes, contours, or vectors on a sweep surface using the Sweep Surface dialog box (Figure 29.1.26).
 Graphics and Animations

 Sweep Surface
 Set Up...
The basic steps for generating a mesh, contour, or vector plot using a sweep surface are as follows:
 ,
,
 , or
, or
 ) to move the sweep surface through the domain along the specified
Sweep Axis.
ANSYS FLUENT will update the mesh, contour, or vector display when you release the slider. You can also enter a position in the
Value field and press the
<Enter> key to update the display.
) to move the sweep surface through the domain along the specified
Sweep Axis.
ANSYS FLUENT will update the mesh, contour, or vector display when you release the slider. You can also enter a position in the
Value field and press the
<Enter> key to update the display.
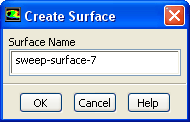
The surface that is created is an isosurface based on the mesh coordinates; the contour or vector settings are not stored in the surface.
You can also animate the sweep surface display, as described below, rather than moving the slide bar yourself.
Animating a Sweep Surface Display
The steps for animating a sweep surface display are as follows:
Previous:
29.1.4 Displaying Pathlines