[ANSYS, Inc. Logo] return to home search
next up previous contents

Step 1: Mesh

1.   Read the mesh file tubebank.msh.

File $\rightarrow$ Read $\rightarrow$ Mesh...

2.   Check the mesh.

figure General figure Check

   ANSYS FLUENT will perform various checks on the mesh and report the progress in the ANSYS FLUENT console window. Ensure that the minimum volume reported is a positive number.

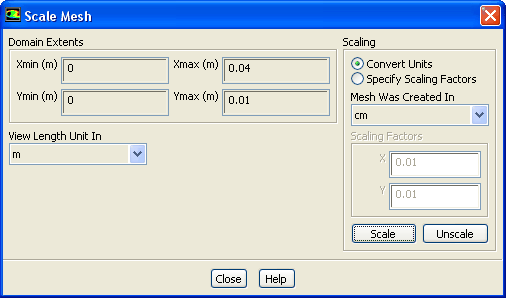
3.   Scale the mesh.

figure General figure Scale...

figure

(a)   Select cm (centimeters) from the Mesh Was Created In drop-down list in the Scaling group box.

(b)   Click Scale to scale the mesh.

(c)   Close the Scale Mesh dialog box.

4.   Check the mesh.

figure General figure Check

Note:   It is a good idea to check the mesh after you manipulate it (i.e., scale, convert to polyhedra, merge, separate, fuse, add zones, or smooth and swap.) This will ensure that the quality of the mesh has not been compromised.

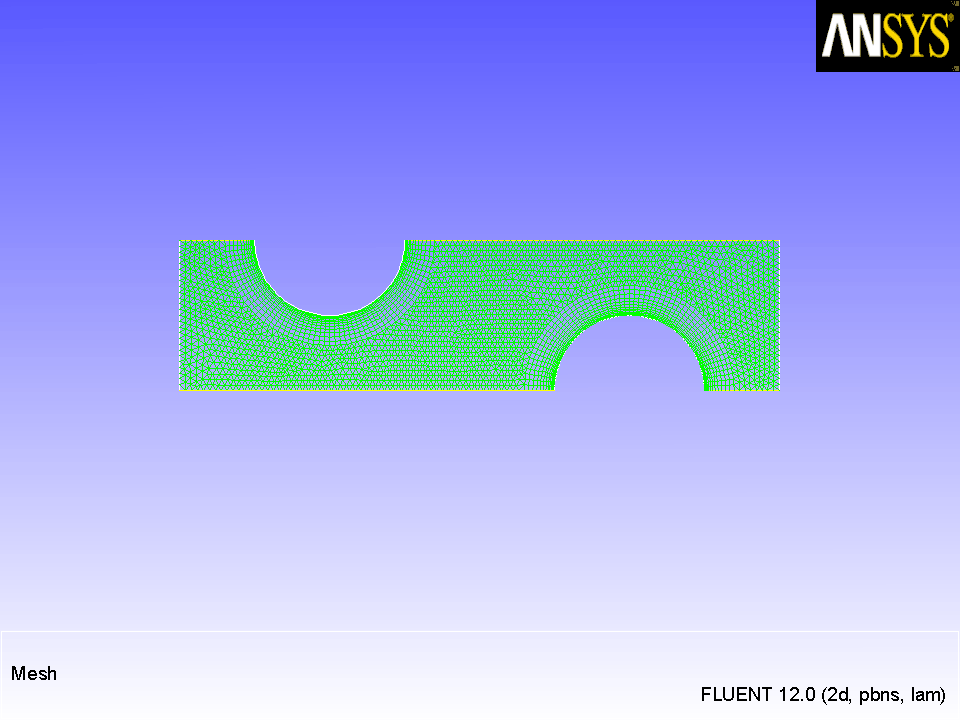
5.   Examine the mesh (Figure  2.2).

Figure 2.2: Mesh for the Periodic Tube Bank
figure

  Quadrilateral cells are used in the regions surrounding the tube walls and triangular cells are used for the rest of the domain, resulting in a hybrid mesh (see Figure  2.2). The quadrilateral cells provide better resolution of the viscous gradients near the tube walls. The remainder of the computational domain is filled with triangular cells for the sake of convenience.

Extra:   You can use the right mouse button to probe for mesh information in the graphics window. If you click the right mouse button on any node in the mesh, information will be displayed in the ANSYS FLUENT console about the associated zone, including the name of the zone. This feature is especially useful when you have several zones of the same type and you want to distinguish between them quickly.

6.   Create the periodic zone.

  The inlet ( wall-9) and outflow ( wall-12) boundaries currently defined as wall zones need to be redefined as periodic using the text user interface. The wall-9 boundary will be redefined as a translationally periodic zone and wall-12 as a periodic shadow of wall-9.

(a)   Press $<$ Enter $>$ in the console to get the command prompt ( $>$).

(b)   Enter the text command and input the responses outlined in green. as shown:

>mesh/modify-zones/make-periodic

Periodic zone [()] 9

Shadow zone [()] 12

Rotational periodic? (if no, translational) [yes] no

Create periodic zones? [yes] yes

Auto detect translation vector? [yes] yes


computed translation deltas: 0.040000 0.000000
all 26 faces matched for zones 9 and 12.

zone 12 deleted

created periodic zones.


next up previous contents Previous: Preparation
Up: Modeling Periodic Flow and
Next: Step 2: General Settings
Release 12.0 © ANSYS, Inc. 2009-02-09